Showing posts with label organization. Show all posts

Sunday, August 26, 2012

So, where have I been?

In recent weeks, I have been emailed by a few friends asking where I have been lately. I'm sure you've all noticed my absence on this blog that has lasted longer than I anticipated--six months to be exact! 

This momma has been busy with life in general. In these last several months, there has been heart ache, answer to prayer, celebrations, transitions, and tons of organization around the house! We have seen the girls grow in many areas and we've grown as a family. Here are some highlights to catch you up on everything!

1.  In March, we celebrated A's one-year anniversary! Although it was a joyous time in our eyes, for her it was a struggle because it brought back memories and some uncertainties in her heart. So, this brought me tons of heart ache. Lots of tears on both ends left me wondering if I could handle being a foster mom any more. Parenting is a hard job, but when you are dealing with a five-year-old who has had lots of scars in her life, it makes this job even harder. We prayed lots (and continue to do so) during the spring and summer for things to smooth out with her.

2.  Crafting has become a rare occasion around here, but instead, I've been organizing many areas of our home. It started with the girls' rooms and now, I'm working on the basement. Although A's room is decorated, Little S' room is not so much. The basement has come a long ways, but it is so worth it. I have boxes of kids' clothing all labeled, which is what the majority of the stuff is down there. This spring, we switched rooms with Little S', so my room isn't feeling very homey yet. My sewing machine is set up, but I have yet to figure out how I'm going to set up notions and such.

3.  In May, we heard about a glitch in Little S' adoption process. Even though it is something beyond our control, we are determined to prayerfully get it settled so we can move ahead and adopt her. I can't go into any details here, but if you think of it, can you pray for this situation? We should know more specifics in October.

4.  We went to California for a conference and family vacation in June. While Q and I went to sessions designed especially for those in ministry, the girls had child care workers who kept them busy with lots of fun stuff to do. A huge highlight of that time was for A to meet Patch the Pirate! We even took a picture with him. Then, after a few days, we headed up north to be with my side of the family. Everyone there fell in love with the girls. We had so much fun doing things around the Bay Area and just hanging out together.

5.  In July, we began getting things ready for A to start school. We enrolled her in a Christian school knowing that her adoption day was close. At the end of July, we received an email saying that the finalization of adoption was happening on August 21. It was also Little S' 2nd birthday! So, on that day, we celebrated her joining our family. We had Q's sister and family and some close friends join us in the court room. Then, we had a party at a park nearby with some additional folks who have prayed during this journey. Thanks to all of you who have prayed for this day to happen. She has been our daughter for over a year, but in the eyes of the state, she has been our daughter for almost a week now. Continue to pray for us as we go through some "growing pains" post-adoption. Lots of conversations and tears have already happened, but at least now we all know she's here for keeps.:)

And now, may I introduce to you Miss A, who we've kept her first name the same, but we've changed her middle name to Joy (named after Aunt Abigail and cousin Annalina who share the same name!:)

Here's Alyzza Joy Johnson....


We could not share her name or picture up until now because of foster care regulations. I will have more pictures and details about her adoption day later. For now, I hope I've caught you all up on what's happening in the Johnson household and given you additional things to pray for.  Love you all.--Theo

Wednesday, January 4, 2012

Come and join me....

Happy new year, everyone!

Life has been busy, but this year I've got a plan to keep up with the important things in life. I love organization, but with the girls joining our family this last year, things around the house have become very disorganized. I was simply surviving as a wife, mom, and keeper of my home. This year I really want to thrive!

So....for the past couple of weeks, I've been reading, researching and trying out new things to help me be all that I can be for the Lord and my family. Here are a few things that I am beginning in this new year, that I hope will help you as well:

Personal Growth: I know that I can't do anything well without the Lord's help, so I'm striving to get to know Him better through Bible reading. A devotional book by Jason Janz called, Alone with God, should help me with this goal. I'd also like to read some books and on the top of the list are....Changed into His Image, by Jim Berg, The Ministry of Motherhood, by Sally Clarkson and Kisses from Katie, by Katie Davis.

Home Organization: I found a neat website called Home Storage Solutions 101 and I love it! Each week, you're given a new area in your home to tackle and get organized. This week's challenge has been to clear kitchen counters for more space and to keep your sink free of dirty dishes as much as possible. It's been a little bit of a challenge, but I'm already seeing improvement. I've already begun next week's challenge--kitchen cupboards! If you sign up for their emails, you will receive a weekly task for the whole year.

Menu Planning and preparation: I am still going to be using E-mealz as much as possible, but I needed to find a way to write out what I'm going to be preparing for each meal every week. If you click here, you'll find several templates to help you with meal planning. I'm currently using design #4 and I have it posted on my refrigerator for easy reference.

Mothering with Purpose: As a new mom, I'm enjoying spending time with the girls. But, I have found with not being very organized with the above mentioned things, that it hasn't left much time on teaching times and special activities with the girls. So, I'm going to be working this week with A on a craft and cooking list. There are so many things she wants to learn how to do, so we're going to make a list and aim for at least one a week. I'm also working on getting some busy boxes together for Little S. Having a better routine with this active 16-month-old will help her grow, but also keep her out of trouble. Yes, I've seen her get bored with toys, and that's when she pretends she's a tornado and all of our belongings are strewn all over the house.:)

Of course, these are just a few areas of my life; there is so much room for growth in my marriage, church ministry responsibilities, musical abilities, crafting, and community involvement. I haven't written down ideas for these other things yet, but I will in the days ahead. Each new year is like a blank canvas. It has no mistakes in it; it just has room for it to become beautiful. I know that the Lord can enable us to become more beautiful in His eyes as we strive to please Him in every area of our lives.

How about you? What new things would you like to accomplish this year?

Saturday, March 5, 2011

A decorative dry-erase board

When I saw this idea from January's issue of Real Simple magazine, I knew it would be a neat thing to do in my kitchen. This dry-erase board is perfect for writing my to-do lists for food I have to make and prep.

It's currently sitting on one of the counters, but it would be great to put it on the wall somewhere. To make one yourself, all you have to do is find a frame and decorative paper or fabric to put inside of it. Make sure that the paper or fabric is light in color so that your writing shows up. Use a dry-erase marker to write your list, and when you're done with something, it's easy to erase it. You can also change your background to go with the season, or make it match the room you have in it. The possibilities are endless!

Here are some other ways to use this board-- write your shopping lists, reminders, project ideas, quotes, doodles, notes to members of your family or guests--can you think of anymore?

After having just one of these in use, I've been thinking about putting more around the house. It's going to be fun doing this--and for those who see my special notes.:)

Friday, October 22, 2010

Finally, an organized sewing nook!

For months, I've not liked the looks of the shelf in the craft room. And lately, it's become more disorganized and has been driving me nuts! It has not been very "workable" as a lot of my tools and notions were hidden in a couple of clear storage containers. I had to do this in our condo, as the kitchen table served as my sewing table. I could just pull out what I needed and set to work.

But now, in a bigger space, with more notions and patterns and things, I've needed to do something with all of my sewing stuff.

Here's the before picture:

And here's the after--much better, I think!

I found the collapsible crates at my local Dollar Tree. Only two of the sizes worked for this shelf. At close to three feet wide but only 7-1/2 inches deep, I was limited to the boxes I could fit on there. I'm still happy with the results! Everything has its place. In fact, my patterns which were hidden in a cupboard, are now easily accessible.

Each of the boxes holds the following: top row-- extra notions like extra elastic and maternity panels, second shelf-- thread and bobbins, ribbon, tools (tracing paper, measuring tape, pins, needles, etc.), third shelf-- zippers and quilting/sewing kits, bias tape, lace and eyelet trim, bottom shelf--fusible web/iron-on transfers and two boxes of patterns.

These canning jars add lots of color with the contents they hold. They hold rick-rack, buttons, small embellishments, scrap trim and ribbon, velcro, elastic, snaps and fasteners, and my scissors.

After organizing all of my tools and notions, I had to do something with my fabric! With all of the fabric that a couple of friends recently gave me, I had to find room in one of the built-in cupboards in that room. I moved all of the craft and knitting supplies into another cupboard, and was able to fit all of the fabric (except for the big bolts of satin) into one space!

Take a look...

I organized by color for the most part. There were a few pieces that just didn't fit into a color category, so they are stacked neatly on top of the denim, black and white pieces. The bottom area also holds some flannel and fleece. One box contains current projects (or ones I want to do) and the other one is full of scrap fabric. I'm so excited that I now can work with my stash more easily. Before, most of it was stashed into boxes--no fun!

Hope this gives you some ideas on organizing your stash of sewing supplies. If you already have organized your things, what ideas can you give that I haven't already? I'd love to hear them.:) Happy sewing!

Tuesday, June 29, 2010

Organization tips for children's ministry

I've been enjoying teaching Sunday School this year. I teach the primary class, and Zann teaches the junior class. We are currently using the Joyful Life curriculum put out by A Beka Book. The program is well-organized; the songs are wonderful; and the stories chosen for each age group are great!  

Just as in any ministry, we should strive to be excellent in all we do. Being organized in our preparation helps so much. When we begin our class time, we're not focused on the materials, but rather on teaching these precious children the truths in God's Word. 

Here are some tips that have been a huge help to me each week:

1. Pray. Pray consistently for your students by name. Pray that God would help you teach the lesson well and to be sensitive to the Holy Spirit's leading.

2. Prepare ahead of time. Don't wait until the night before to prepare yourself for Sunday's lesson. Work ahead a few days so that you know the story well enough to not be glued to the page. Looking ahead also allows you to see if you need to gather any other materials needed to supplement your lesson.

3. Practice, practice, practice. Work on any songs you don't know and practice telling the Bible story aloud a few times.

4. Pull out the worksheets early. I use a file folder to hold the worksheets and attendance stickers. They are ready to go before the children arrive. You don't want to waste any time trying to find the right page. 

5. Post-it notes work wonders! I mark the songs we're going to sing with these notes marked with #1, #2, #3, etc., in the song book. When I'm leading songs in the opening time, I can easily flip to the next one without any trouble. 

I hope these tips were a help and encouragement to you in whatever area of ministry you do in your local church. By the way, if you happen to get sick or have to leave town, these tips will help someone fill in for you easily. 

Have a great week ministering to others in your corner of the world.:)

Saturday, June 19, 2010

Spring cleaning: our bathroom

Hurray! The entire house is now done...right before summer officially begins this coming week. It feels really good to be done. Next year, I will begin earlier, and I won't have as many projects (at least I don't think so!) because some of the work in each room had to do with decorating and getting things organized in our new place.

There are a few things I have added to a project list that should get done this summer. Sometimes lists just get longer, so we'll just see how well we do in the next few months. ;)

Here's what gone done in our bathroom:

1. The fabric shower curtain was washed.
2. The sink, tub, toilet and walls were cleaned thoroughly.
3. Parts of the ceiling were cleaned because I saw some orangy-yellow spots up there. (Does anyone know what causes that? It was easily cleaned off, but I'd hate to keep wiping them off every few months!)
4. The vanity and cupboards were cleaned and organized.
5. The clock and mirror were cleaned.
6. The floor was mopped.

Here's a project for this summer...see the space above the new heater that was installed? It's a terrible eye sore and I don't know what to do with it. I've thought about sticking in some fake flowers in there, but I'm not sure if it would look good. The pictures to the left can be moved (or removed because they're just $1 store finds and I'm okay to part with them) to make the new decoration above the heater work. What do you think? Can you help me out?:)

Let me know if you have any creative ideas for my bathroom problem. I'd love to hear them. 

Thursday, June 17, 2010

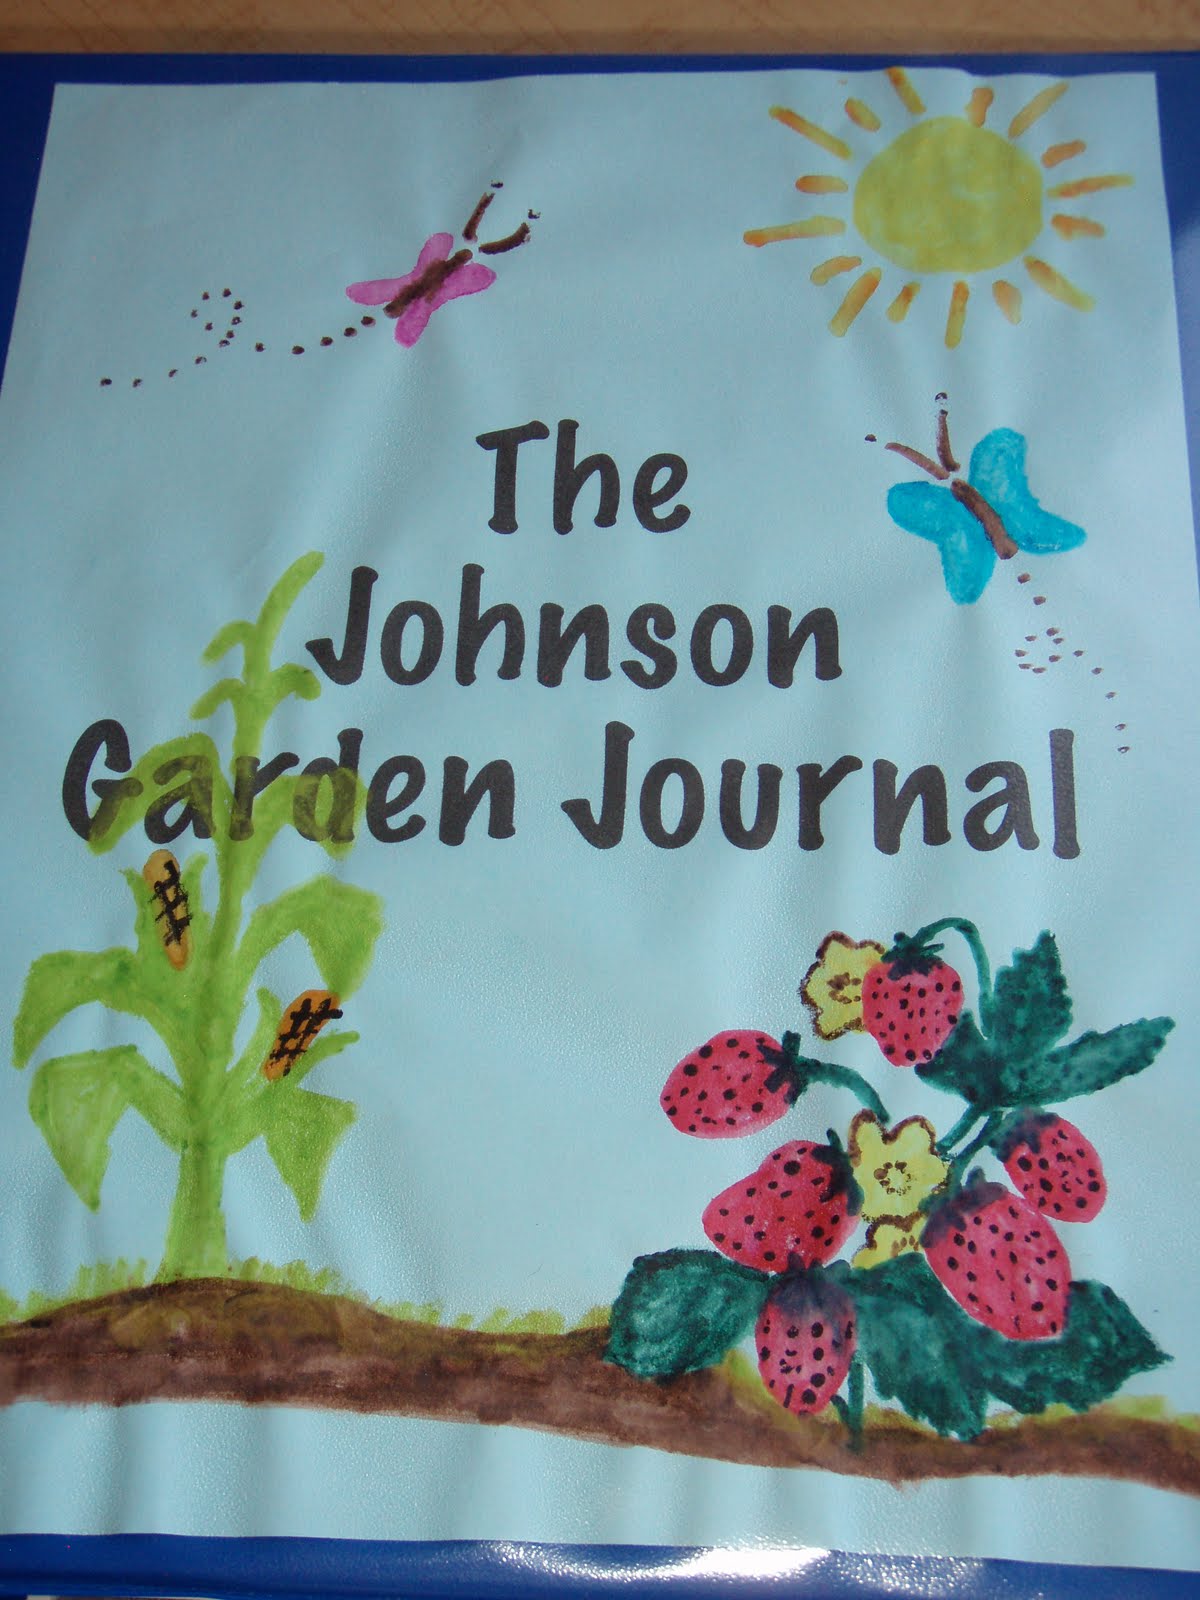
The Johnson Garden Journal

While I was making a garden journal for our nephew, Gabriel, Q asked me to make one for us. I changed a few things on the inside and used a regular-sized 3-ring binder to hold everything together.

For the cover, I printed the words on our computer, then hand-painted the pictures. I found a couple clip art pictures on line and used those as a guide to paint the corn stalk and strawberry plant. 

Here are the tabs I used for the journal. I printed off worksheets on the Homestead Garden website.

Garden chore list
Catalog wish list
Layout & Design
Plant information
April-October tabs (included are the "garden journal" sheet which has room to write a "to do" list and write notes on things that are growing; also included is the "seed starting notes" page.)
Future reference
Garden reference/contact information
Extra paper

I also included some sheet protectors and dividers with pockets to store things in. If you didn't get to see the video on how I put Gabriel's journal together, you can go here and watch it. 

Hope you're able to use this idea to journal to help you with your garden from year to year. Happy gardening!:)

Tuesday, June 15, 2010

Spring Cleaning: the office/craft room

As the official start of summer is around the corner, the spring cleaning is just about done. All we have left to do is the second bathroom, which should be done within the next couple of days.

The office/craft room was worked on here and there over a few days. I'm glad that it's organized better because it was quite a mess!

Here's what got done in this room:

1. Every cupboard and drawer was thoroughly organized.
2. All the furniture was cleaned/dusted.
3. The sewing bookshelf was organized.
4. The windows were cleaned.
5. A huge stack of papers was weeded through and filed.
6. A couple of things were put on the wall, including the clock that you see in the above picture.
7. The floor was vacuumed. 

This counter under the windows was covered with projects, including the greenhouses which have now been moved. The fan sits there as it helps blow cool air into the room for the summer. I'd like to make curtains some day for these windows which overlook our back yard.

I just have a couple decorations on that shelf to keep it simple and neat.

This memo board, which can also act as a calendar is finally on the wall! I have to-do lists, notes, coupons and a couple of pictures that serve as inspiration for future craft projects.

My sewing bookshelf is a lot neater now, but I'd like to do more to it in the future. I'd love to put in some bins to keep things hidden and make it look more appealing.

Just one more area left...can't wait!:)

Saturday, June 5, 2010

Spring cleaning: Our bedroom

Another room is done--our bedroom. We're almost done with spring cleaning the entire house and I'm really excited!

Here's what was done in our bedroom:

1. All the furniture was thoroughly dusted.
2. Q and I sorted through all our clothes and got rid of what doesn't fit or what we don't wear anymore. There are two large bags ready to go to the local thrift store.
3. The vanity drawers were cleaned and lined with contact paper.
4. I moved Q's folded clothes from the family room to the built-in vanity drawers in our room.
5. All the drawers and the closet were reorganized.
6. I got caught up with ironing and now all of Q's shirts are looking good!
7. I decorated our walls with pictures.
8. Storage under our bed was organized.
9. The window and mirrors were cleaned.
10. The floor was vacuumed.
 
The closet looks so much neater than before. Getting rid of clothes we didn't wear anymore has streamlined our wardrobes.

These vinyl letters were found at the dollar store a while back. I'm glad I was able to finally use them on one of our walls.

I found this small plaque at Target on clearance for just a couple dollars. It says, "Love is not about who you live with...It's about who you can't live without." I framed a few pictures of the two of us and placed them around it. I also have pictures of us on our dressers and on the walls next to our bed. Every time I look at the pictures I'm reminded of the wonderful marriage God's given us.

The last part of my spring cleaning will be done soon--hurray! It's time to start enjoying the summer outside.:)

Thursday, May 27, 2010

Spring cleaning: the guest room

Working on the guest room took a little longer than a week, but I'm so glad it's done! We had two college girls spend the night a couple days ago and they said that it was a comfortable room. We also call it the family room. There are games and toys as well as a t.v. to watch movies.

Here's what was accomplished in this room.

1. The main closet was organized (it was a disaster before!).
2. Storage under the beds was rearranged.
3. Movies and audio cds were organized.
4. A couple furniture pieces were rearranged.
5. The bookshelf was organized and a few decorative pieces were added to the shelves.
6. Windows and mirror doors (on main closet) were cleaned.
7. The room was thoroughly dusted.
8. The linen closet was organized. Old medicines were thrown out.
9. I made curtains for the two windows and linen closet.

I'm so glad the main closet is in better shape! I can now walk in there without tripping over things. Coats hang on the left; games and toys are on the shelves; Q's outdoor equipment and our suitcases line the top shelves.

With our guests coming, I had to get these curtains done. Q helped me by putting up the rods. Then after several hours of work during a couple of days, the curtains were finished. I found both fabrics at Wal-mart for great prices! The bottom patterned fabric was only a dollar a yard, and I didn't need too much of it for all three curtains.

We like the look of the two fabrics together. I made two panels for both windows. When we want to let the light in, we just push each panel to the side.

I bought a small tension rod for the linen closet to hang the third curtain I made. It matches the window curtains. Inside the closet are extra towels, personal items and cleaning supplies. It's all neatly arranged, but in the future, I'd like to place an extra shelf in there.

That's all for now! How's your spring cleaning coming? I'm almost done, and I can't wait!:)

Sunday, May 16, 2010

Spring Cleaning: the laundry room

I got another room done this past week--yahoo! The laundry room was thoroughly cleaned and organized, but I have future projects in store for this little space. I'll explain in a minute, but first, here's the list of things that were accomplished:

1. Cupboard was organized and shelves were wiped down.
2. Door was cleaned (not pictured).
3. Washing machine/dryer unit was cleaned inside and out.
4. Baseboards were wiped down.
5. Windows were washed.
6. Floor was swept and mopped.
7. A couple items were removed to make the room neater.

As for future projects, there is some wall space under the cupboard that I'd like to put a shelf to fold laundry on. I'd like to install it on hinges so that it can easily fold up when I'm done. I'd also like to paint some pretty flowers on the cupboard.

I recently put this curtain up. It covers the window part of the side door. When I want to let some light in, I just tie it with the ribbon. The valance in the kitchen is from the same curtain package that I bought several years ago.

Q and I bought this storage bench from a nearby thrift store for five dollars! It's been cleaned, but it needs a good paint job. It looks like it will be a project for the summer. We thought it would be a good place to sit and take off boots in the winter, as well as store winter items and other laundry things inside.

I've been wanting to buy a sign like this for a while, so when I went to Hobby Lobby yesterday and saw that signs were 50% off, I just had to buy it. I can't wait to place it on the wall.:)

How's your spring cleaning coming? Keep it up--you can do it! I've just got a few areas left...can't wait to be done.:)

Monday, May 10, 2010

Spring cleaning: the kitchen

I was so glad to finally get another room organized and deep-cleaned. The kitchen took a few hours on a couple different days.

Here's what I got done in the kitchen:

1. Walls were were wiped down with all-purpose cleaner.
2. Cupboards were cleaned and contents were organized.
3. Oven was cleaned inside and out.
4. The refrigerator was cleaned and organized.
5. The pantry was wiped down and organized.
6. The floor was swept and mopped.
7. The trash can was washed.
8. Small appliances were cleaned thoroughly.

The open pantry holds canned and dry goods as well as my cookbooks. 

How's your spring cleaning coming? I'm on a roll now...hope to get done before summer is here!;)

Monday, April 5, 2010

Spring Cleaning: the guest bathroom

Last week, I picked an easy room to work on because with Q working some extra hours, I knew that the majority (or all) of the cleaning and organizing would be done by me. A while back, I started working on the guest bathroom, so just a few things were done this last week to finish it.

Here's the list of what was accomplished in this room:

1. Deep clean walls.
2. Clean bath tub, toilet and sink thoroughly.
3. Wash small window and mirrors.
4. Clean inside vanity and cupboards.
5. Wash fabric curtain.
6. Replace vinyl curtain liner.
7. Line drawers with decorative contact paper.
8. Mop floor.
9. Wash rugs.
10. Fill vanity cupboard and drawers with necessities for guests.
11. Fill basket with toiletries for guests (will be writing more about this later...)

On the sink counter, I've placed the toiletry basket, a framed picture of me and Q, and this candle that we found at the local thrift store--brand new. It is a vanilla soy candle and I love the silver stand it sits on!

This week will be another busy one, mostly for me because I've got to finish up some crafts for birthday gifts--and I'm going on a ladies retreat this Friday.:) So, I don't know if we'll have another room done or not. We still plan on doing little things here and there, so that when things settle down, we'll be able to finish up our spring cleaning cards easily. 

How's your spring cleaning coming? What's been your latest project?

Monday, March 22, 2010

Spring cleaning has begun...

We've just begun a new season, and I'm excited, aren't you? It's a time when we see new life and enjoy the sunshiny weather...or perhaps something like this:

Did any of you have some snow this past weekend? It was quite the site to see this on the first day of spring! It's mostly gone now as it was warmer outside today. 

I also like the motivation spring gives me to get some much needed projects done around the house. To get started, I made a list for each room on a separate index card then put them all together on a ring. There are some things that are specifically mine to do or for Q to do. The rest are things for us to work on together. The goal is to get one room done a week. Although we've been here for six months, I really want to feel like we're finally settled by finishing the decorating and organizing in each room.

I've already been able to get a few things done, even ones that aren't necessarily on a list--like putting out these bird feeders. We didn't have much success at our other place with these, so we'll see what happens. I may have to place them elsewhere to attract birds if the front porch doesn't do it.

I've also repaired some clothing, gone through my magazine stash, sorted through the freezer and am planning out the garden with Q--all while working on the room for the week! I'm highly motivated so I've got to keep going!;)

What projects do you hope to get done this spring? I would love to hear what you're all up to these days.

Tuesday, March 9, 2010

Chalkboard canister labels

This organizing project was in my mind for quite a while, so I was glad to finally get it done a few days ago. I've seen jars with chalkboard labels at craft stores, but they cost more than I'd like to spend. I knew I could put some together affordably, as well as make them removable (in case I want to change my canisters or put the labels elsewhere!;). 

I found this chalkboard sticker sheet at the dollar store. It actually has a big sticker on the back, too, so there's lots of room to write things on if you want to use it the way it is. This was my starting point on the project. I also gathered a pencil, scissors, ruler, glue stick, photo corners, sticker dots and chalk to make it all come together.

I used my ruler to make strips along both stickers. Removing the white decoration, I was able to make the labels 2-3/4" by 1-1/4 inches.

I left the backing on the labels so that they wouldn't permanently adhere to my canisters. You can remove these type of stickers from walls, but not from plastic canisters. I glued on some pretty gold photo corners to each corner. 

Using white chalk, I wrote a dry good item on each label. I placed a few sticker dots to the back of each before placing them on my containers. 

I'm happy with the end result. Best of all, it hardly cost me a thing, since I had most of the items on hand. Besides being able to erase the labels as needed, they can easily be removed by peeling off the sticker dots. If it leaves a sticky residue, you can wipe it off with some Goo Gone to make your canister as good as new!

Hope you can use this tip for better organization anywhere in your house. What's your latest organizational project? I'd love to hear about it!

Thursday, January 28, 2010

Easy (and free) lid organizer

I've been working here and there on organizing and decorating each room. I'm hoping to be done soon so that I can show you pictures. My main focus lately has been the kitchen. I've almost got it the way I want it. I've had the same challenge here as I did in our last place regarding the cupboards. It's hard to get the pots, pans, lids and baking sheets organized in a way so that when you pull things out, things stay neat.

I've been wanting to buy a lid organizer, but a couple of the ones I've seen have been too tall for the space I have. This old house we live in has its challenges with shelving. I'm making the best of it, trying to be creative when I can.

When we were at Target recently, something popped out at me that I knew would work.

The longer box in the back was used to store drip pans on their shelves. When we were at the check out, I asked the cashier if I could have it. Not only does this work well because its sturdy, but it was absolutely FREE!

The slots are perfect for storing my lids. I have to space them out, so that they're not crammed in there. The only glitch with this is that when I need to get out the biggest lid, I have to take out the one in front of it too. There just isn't a lot of space between the tops of the lids and the shelf above them.

At a different trip to Wal-mart, I found this one and asked the cashier there for it. I'm pleased with my new organizing find. I suppose I could cover both boxes with Contact paper for a decorative touch and more durability. I'm happy with the way they are now. 

Do you have any great tips on organizing your kitchen? I would love to hear your ideas!:)

Monday, October 26, 2009

How to keep your china looking its best

It's been fun getting all of our things organized in our new home. A couple days ago, I washed and put the china away in a small cabinet that we use for storing  crystal, china, and other serving pieces. Someday, I'll get a real china cabinet, but in the meantime, this works.

I've been reading a book called, Good Things For Organizing, by Martha Stewart. There are some things that she does that I just can't do because it would be too expensive, or we just don't have this or that. But--there are many things she does that I just love because of the detail, simplicity or beauty of it. This book goes through each room in the house and gives practical tips for organizing. 

She gave a tip on using felt pads to keep your china looking great. When stacked, the bottom of one can scratch the one under it. Now, my china set is an older one, passed down to me by a friend several years ago, but I'd still like to keep it as long as possible. Who knows when Q and I will be able to afford a brand new set--maybe never, but that's okay. We don't use the china too often anyway. I've thought recently that perhaps I should use it more. Why save it just for special occasions? 

Okay, now to how to make your own felt pads....

Simply cut rounds of felt slightly smaller than the plates and stack them. I found bowls and large mugs to trace onto the felt with a pen, then cut out the circle shapes. I used pinking shears like she did, and they look so pretty! I placed one on top (although not necessary), to keep that plate clean. Really easy, eh?

If you don't have felt, you can use acid-free paper. You can also use felt pieces to put in your stainless steel pots to keep them from scratching each other. 

Now, have fun cutting out your felt circles and using your china a bit more. :)

Monday, September 28, 2009

Our New Home: loving the details...

I love finishing touches, don't you? Here are a few at our place right now that I really love:

This new faucet in bathroom 1 was installed by a friend of ours who is a plumber. Randy not only donated his labor, but also a few things for the bathrooms, including this faucet.

The built-in vanity in bedroom 2 was painted white. It looks so clean and neat looking. The handles have small flowers on them. 

And speaking of handles...you can find several of these in the kitchen. They were so dark before a couple of the ladies cleaned them up. Looks like copper to me, doesn't it?

A couple of us worked on lining the kitchen cupboards with patterned Contact paper. I was very pleased with the result. It's making it easy as I've been working on putting things away in the kitchen. 

As I'm writing this, Q is working on the hardwood floors. I'll show you a picture or two of that when he's all done.