Showing posts with label saving money. Show all posts

Tuesday, August 16, 2011

A lifesaver in the kitchen

I know it's been a while, but things have been super busy around here. With fighting a cold and getting A ready for school, life right now is having me focus on more important things.

But--I wanted to share with you something that has been motivating me to do better at meal planning and cooking during this busy time of taking care of two little girls. My sister-in-law told me about E-mealz, a website devoted to helping others with this endeavor. For a small monthly fee you get a 7-day menu plan (just dinners) and shopping list at the grocery store of your choice (there are a couple to choose from or you can choose an option to use another store). They keep your shopping cost low by searching for deals and listing store-brand items on the shopping list. They do it all (minus the shopping, of course!).

Isn't that amazing? Even though I have always enjoyed putting together a meal, things get crazy around here and sometimes it forces me to do something easy--which is not always the healthiest food to eat, either. But with this system, I am cooking meals again and everyone loves them. I chose the 4-6 person low-fat plan, using Wal-mart as my store. I always have leftovers for the next day, so that helps, too. I don't usually choose all seven meals, but rather my favorite 3-4, which lasts all week.

So, what do you think? Check out the site today if you'd like to learn more about it (click on the link above).

Below is a picture of one of our favorite meals so far--Apple Baked French Toast....yum!


Saturday, July 30, 2011

From my latest thrift store shopping experience....

We have done some thrift store shopping this summer, but this past Thursday was one of the best yet! When I take the girls with me, it becomes a challenge to really sort through stuff and find those "gems", so I took this opportunity while Q had the girls to go out and see what I could find. I went looking for a big basket, but did not find one. Instead, I found these items at my favorite thrift store in town--Sister Carmen's:

Backyardigans Hopsplash: 25 cents! The box was torn, so I really hope it works when we set it up this week for A to have fun with.

Soft letter and number cube: 10 cents! Little S is having fun with this already.:)

Rainbow fish puppet: 10 cents! I love collecting characters from children's books. This is a nice addition to my collection.

Little House on the Prairie book set: $2.25 (25 cents per book) This set is going to one of my nieces for her birthday. She's going to love it!

My Little Bible: 25 cents--This is a gift for Little S. We gave A a Bible for Easter, so I thought this would be neat to give to the baby as well. I'd love to make it a tradition that we always give a Bible or Bible story book to every foster child we have in our home.

Children's books: 25 cents each. The Goldilocks book is an older edition and it is also a pop-up book. It's really cute!

Little S really likes the My Big Animal book. It's full of animal pictures that any young child will love.

Children's craft books: 25 cents each. There are lots of fun things to do for A and I inside these books.

File Folder Games: 25 cents! This has never been used.:) When I see a teaching tool like this and it's super cheap I just have to buy it! The pieces have to be cut out then stored in file folders. It will be a fun way to reinforce what A is learning at school.

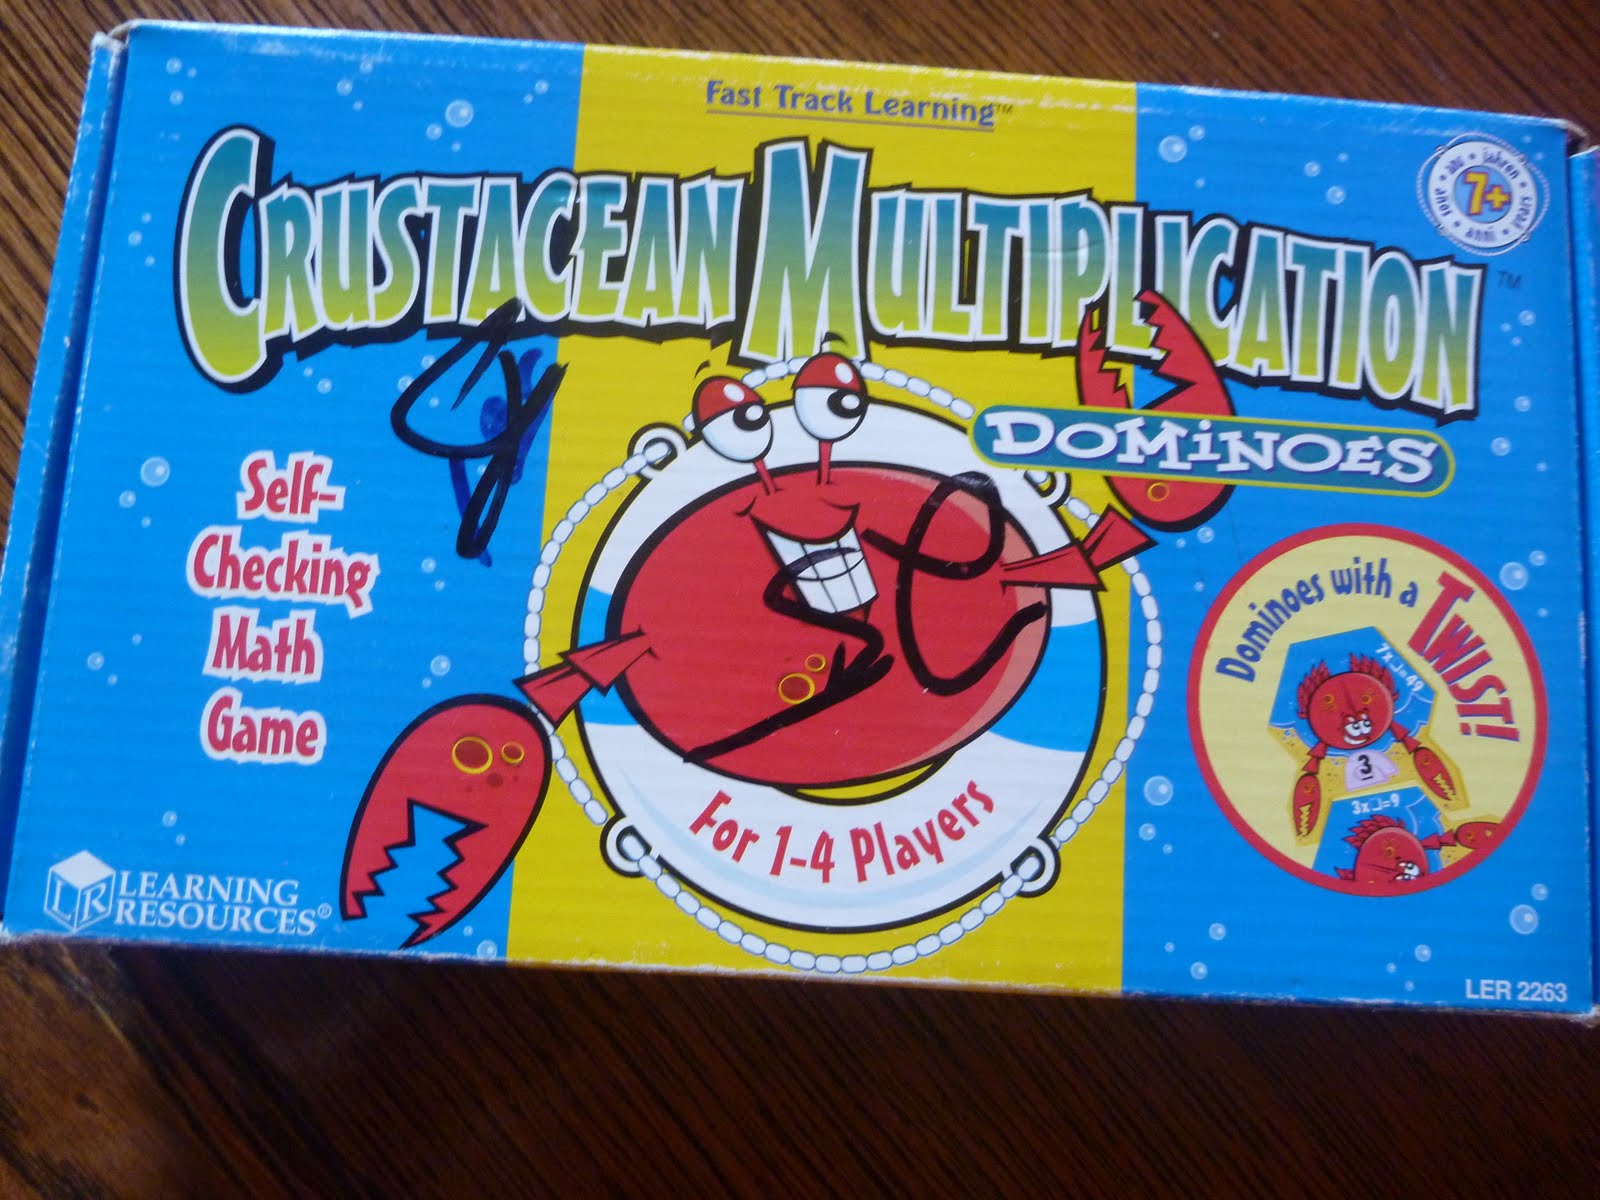
Crustacean Multiplication Dominoes: 25 cents. Again, it's another teaching tool for kids and I love it!

Animal Bingo: 25 cents! I really like this one, and so does A. The pieces are durable and there's even a pouch to store them in.

The animal pictures are beautiful and bright!

Duck prints: 50 cents each. I've started a collection of duck items for when I change the decor in one of the bathrooms. It will be the kids' bathroom and it will so cute with these pictures.

Ralph Loren western shirt: 99 cents! I love the look of this shirt--perfect with a pair of jeans.

Sonoma every day t-shirts: 99 cents each. These looked practically brand-new and they will be great for layering during the colder months.

Riders boot cut jeans: 99 cents! They fit great and will look good with any of the shirts shown above.

Billabong purse: 25 cents! The top part of the purse is made out of corduroy and the colors below match the clothing items that I bought on this day, too.

Did you add all that up yet? :) My grand total for this thrift store shopping trip was....

$11.83!!

This was an awesome day full of great finds. It's fun to find unexpected treasures for incredible prices. God is so good to take care of our needs (and wants, too!)

Wednesday, June 29, 2011

Little S and her curls

When people first meet Little S, they say things like,

"Look at those long eyelashes!"
"She's so teeny to be walking already."
"She's such a beautiful baby." (we hear this one A LOT--in fact, Q calls her "the show stopper" because every where we go, people stop to see her and sometimes a crowd will gather--seriously!)


And then my all-time favorite, (which was what I said the first time I saw her) is,

"Look at those curls!"

(A took this picture of her curls when she first came to live with us.)

Her curls are beautiful indeed, but it takes time and patience each day to take care of them. Regular detangling spray does not work on her African-American hair. I used a sample leave-in conditioner that my hair gal gave me (which worked well), but I don't want to pay a lot of money for a regular can. I've heard of a couple of other good conditioners that work well, especially for kids, but I'm waiting to try them as I've been using something I made myself (trying to save a little money, folks!). I googled "how to make your own leave-in conditioner, and more than a few popped on the screen. You basically mix four parts water with one part conditioner and shake it up. I actually added more conditioner to the spray bottle since Little S's hair is super curly and gets tangled very easily.

Here's what I've been doing, and so far it works:

Every morning, I spray Little S' hair with water (she's okay with this so far...)

Then, I spray the homemade leave-in conditioner in her hair (she's still okay, but I have to give her something to distract her with)

Finally, I take a wide-tooth comb to comb out her hair. Sometimes there will be a few hard tangles to deal with, and for Little S, this is hard to bear. There are many mornings that I'm literally chasing her around the room as she squirms away. I'm trying to figure out the best way to make her stay put because when she does, the process goes fairly quickly.

Little S will have gorgeous curls for the rest of her life (which we're all a bit envious of, right?):) When she's older she will learn to care for the curls God gave her. Hopefully, this homemade leave-in conditioner will continue to work for her.

Any thoughts or tips on what I could be doing better for this little one? I'd love to hear about it!:)

Tuesday, June 7, 2011

A's Fairy Birthday Party: the decorations

This past Sunday, A turned five years old. We gave her a fun birthday party with some of her closest friends.

We bought a few flower-themed party supplies at the Dollar Tree. They fit the Tinkerbell party A wanted perfectly. Here are some of the things we did to decorate for her special day:

Using fabric paint, I wrote, "Happy Birthday, __________" on the banner. It hung on the front door.

Near the table, four flower/butterfly garlands hung from the ceiling. Three balloons, including one with a picture of Tinkerbell on it, floated behind the table.

We placed a yellow tablecloth and a tissue flower garland on the table. I placed decorative tissue paper and Tinkerbell placemats on the center of the table where the drinks and cake were going to be set. The plates and napkins matched the decorations, too. I also put a picture stand that held three pictures of A.

More flower garlands were hung between the two rooms and by the big chair (which we used as the "birthday chair" where A opened her presents). The paper lantern was one of four that we hung inside and outside. They were so cute! The big bunch of star balloons was a freebie that Q found on craigslist. A family had just celebrated their son's highschool graduation and wanted to give these away to someone who could use them. It was a great idea.:)

Here's a close up of the decorations above the birthday chair.

These flower window clings were placed on all four windows. A had a great time helping me put these up.

And there you have it--the decorations we used for A's party. It didn't cost a lot of money, and they ended up being way cuter (and cheaper) than what I could have made myself. But--I did make a few things for the party anyway, but you'll have to wait to see what those things are.

Stay tuned as we share more ideas and pictures of A's fabulous fairy party.:)

Monday, December 20, 2010

Church Christmas Celebration: the decorations

In preparation for our Christmas party, I invited the Sunday School girls to help me on Friday night. Sophia was the only one who could make it, so it ended up being just her, the other Sunday School teacher, Zann, Mary and I to do this. It turned out well and we got done in just a couple of hours.

I bought several packages of these styrofoam snowflakes at the Dollar Tree. I was glad I picked them up early, because they sold fast! We hung them up randomly on the ceiling using fishing line and paper clips to tuck them into the tiles.

I had a few of these card houses that I made last year, so I taught them how to make some more. We placed battery-operated tea light candles inside each one. These were another dollar store purchase. We also placed some fiberfill and sparkly garland around each house. A snowman sat in front of each one as well.

Each row of tables was adorned with four of these card houses. But before placing them on the table, Zann and I sponge painted snowflakes randomly all over on the paper tablecloth I put on them.

Mary and Sophia decorated this little tree on this table which became our gift exchange area. When people arrived, they placed their gifts around the tree and on the floor in front of the table.

Everyone loved our winter wonderland and we enjoyed putting it together for the party.

Next up...fun and games at our Christmas party! Stay tuned....

Monday, December 13, 2010

What God wants for Christmas

During a trip to my favorite thrift store in town, I found a neat tool I can use with the kids in church or with our future kids at home. It's called, "What God wants for Christmas."

It's a nativity set that is hands-on for the entire family. When you first open the box, you'll see this:

There are seven smaller boxes that are numbered. Inside six of them are characters from the nativity story (the seventh box is a surprise!). A pop-up background scene and a booklet is included. The booklet includes a page for each character (poem and Scripture references) and further ideas on how to use this ministry tool.

You can introduce each character every day during the week of Christmas. If you're using it for a Sunday School class, you can do a character or two over a few weeks--or do all of the lessons in a nutshell at a Christmas party.

I really like this special set. I'm so glad God allowed me to find it at the thrift store at a great price! It will definitely be used for many Christmases to come.

If you'd like to get a set of your own, go here and check it out! Perhaps there are some children in your life that would love something like this.

Tuesday, December 7, 2010

Our church Christmas decorations

This past weekend, Mary and I got together to decorate the church. Mary is a sweet older lady who has become a good friend to me. Q looked around the church for decorations and found a tree we could use. He also found a couple of boxes with decorations, so we sorted through those. Then, he gave us a budget to get the things we needed to complete the look he wanted for the church. When we got done shopping at the Dollar Tree and Hobby Lobby, this is what the tree looked like:

Not too bad, eh? The star tree topper came from Hobby Lobby (it was fifty percent off, so we just paid a few dollars for it!), the ball ornaments were from Dollar Tree and the lights were from the grocery store. After realizing that the ones we had bought from Hobby Lobby had the white wire, I drove to the nearest store to get green wired ones.

Under the tree, I placed four gifts that were wrapped with wrapping paper that I found at church and home. I also used some sparkly ribbon from the dollar store, too. I chose four empty boxes in different sizes to do this easy project. For our tree skirt, we used two snow drapes from the dollar store. We also bought a couple of candle rings for a few electric candles that we placed on all of the window sills along the sides of the church auditorium. We also placed a couple of nativity sets, a poinsettia, and a wreath in different areas of the church.

We spent about $35 for everything, which was the budget Q gave us. Sometimes less is more, and I think everything turned out well. Everyone was surprised on Sunday morning when they saw the decorations.

Downstairs in our children's area, I put up this simple Nativity bulletin board. I've used this set many times before when I taught school.

On the white board, I placed the wisemen and camel from the same bulletin board set to create this new one. I found snowflake window clings at the church, too and placed that around the figures.

So there you have it--simple and meaningful Christmas decorations for our small church. Hope it gives you some ideas for now and the future. It was awesome that we were able to decorate simply without using a lot of money. We made the funds stretch by using things we had on hand as well. Happy decorating!

Friday, October 22, 2010

Finally, an organized sewing nook!

For months, I've not liked the looks of the shelf in the craft room. And lately, it's become more disorganized and has been driving me nuts! It has not been very "workable" as a lot of my tools and notions were hidden in a couple of clear storage containers. I had to do this in our condo, as the kitchen table served as my sewing table. I could just pull out what I needed and set to work.

But now, in a bigger space, with more notions and patterns and things, I've needed to do something with all of my sewing stuff.

Here's the before picture:

And here's the after--much better, I think!

I found the collapsible crates at my local Dollar Tree. Only two of the sizes worked for this shelf. At close to three feet wide but only 7-1/2 inches deep, I was limited to the boxes I could fit on there. I'm still happy with the results! Everything has its place. In fact, my patterns which were hidden in a cupboard, are now easily accessible.

Each of the boxes holds the following: top row-- extra notions like extra elastic and maternity panels, second shelf-- thread and bobbins, ribbon, tools (tracing paper, measuring tape, pins, needles, etc.), third shelf-- zippers and quilting/sewing kits, bias tape, lace and eyelet trim, bottom shelf--fusible web/iron-on transfers and two boxes of patterns.

These canning jars add lots of color with the contents they hold. They hold rick-rack, buttons, small embellishments, scrap trim and ribbon, velcro, elastic, snaps and fasteners, and my scissors.

After organizing all of my tools and notions, I had to do something with my fabric! With all of the fabric that a couple of friends recently gave me, I had to find room in one of the built-in cupboards in that room. I moved all of the craft and knitting supplies into another cupboard, and was able to fit all of the fabric (except for the big bolts of satin) into one space!

Take a look...

I organized by color for the most part. There were a few pieces that just didn't fit into a color category, so they are stacked neatly on top of the denim, black and white pieces. The bottom area also holds some flannel and fleece. One box contains current projects (or ones I want to do) and the other one is full of scrap fabric. I'm so excited that I now can work with my stash more easily. Before, most of it was stashed into boxes--no fun!

Hope this gives you some ideas on organizing your stash of sewing supplies. If you already have organized your things, what ideas can you give that I haven't already? I'd love to hear them.:) Happy sewing!

Saturday, October 2, 2010

Chapstick lanyard

When I was trying to come up with a simple gift to send to a niece for her birthday, this chapstick lanyard came to mind. I saw the idea for it in Lexie Barnes' book called Sew What! Bags. There were no directions, just an inspiring photo to make one of these...so, I decided to give it a try. This is how it turned out:

The measurement of the chapstick holder is 2-1/2" by 1-1/2." It gives a little wiggle room for the chapstick (or any other small item you want to carry). The lanyard strap measured 32-1/2" long before I stitched it inside the holder. It came out to be about 1/2" wide, too. The top can be knotted if it is too long for her, but I purposely made it a bit shorter than normal-sized lanyards because kids just don't need such a long one.;)

I bought a fruity lip balm and placed it (along with some cash) inside before mailing it off to her.

This book has lots of ideas and instructions for many kinds of bags. I want to try a few out in there because not only are they cute but practical, too. Love them!

I have found quite a few sewing books at my library lately. It's a great (and free) way to find awesome ideas to make gifts for the ones you love.

What sewing books have you found to be fun and inspiring? I'd love to hear about them.

Happy Sewing!;)

Wednesday, September 29, 2010

Scrabble tile sentiments

I saw a neat decorating idea when Q and I were at an antique store recently. One of the booths was selling Scrabble letter tiles and holders. They wrote out a phrase with them and put it with a few other table decorations. With a sale going on, I didn't think they cost too much, but one phrase and holder alone would have cost me a few dollars.

Well, a few days ago, I saw a Scrabble game at my favorite thrift store in town and it was only 25 cents! To decorate with these letters was going to be a steal compared to the antique store price. I just love a good deal, don't you?

Here are a few of the ones I have put around the house...(oh, and I still have lots of letters left!)

A simple "I love you" sits in front of our wedding picture.

I have this one on the window ledge above my kitchen sink. I don't know how many times it's already reminded me to pray about something or someone--so it's been a great thing!

I've placed this one next to a couple of ceramic pumpkins and a fall candle. I just love it!

Keep your eye out on a great deal on a Scrabble game...or you can use the one you've got hidden away in your closet if you're not currently playing it. Hope this gives you a fun and simple decorating idea for your home.

Wednesday, September 22, 2010

The Fabric Ring

Have you ever been to a store and saw something that you thought, "Oh, I wish I knew if it would match my _________." Well, I have done that many times, mostly with craft projects I'm working on. I don't always remember to bring a sample piece of fabric with me. Sometimes, I'll even stop by the thrift store on a whim and discover that something there might go with something at home...but I'm not exactly sure. You know what I mean, right?

Well, I came up with something that might save us all from headaches when searching for that matching something. This is my new fabric ring:

These tiny pieces of fabric are currently part of a project I'm working on. I was looking for some matching tulle and metallic trim and I thought to bring these along. All I did was cut a small slit in each one and put it on a ring. It is still in my purse, as I search for the right coordinating items. Hey--I could also make it part of my key ring if it's not too bulky!

As I work on other sewing projects, I can keep adding to the ring. I can also use it for attaching pictures of that blouse that needs a coordinating scarf, or that skirt that needs a new trim added. Whatever you need it for, this handy ring will save you some time and perhaps money from making terrible purchases.

Do any of you do something like this...or variations of it? I'd love to hear about it! Happy sewing!:)