Thursday, January 12, 2012

Simply cute and whimsical

This year for Christmas, the girls were flooded with gifts from family and friends. This was our first year as parents, so it was fun to see their reactions as they opened up their gifts. As you all know, I love giving and receiving handmade gifts. They are so special and heartfelt. When A opened up the package that contained these aprons, she was ecstatic!

She's been wanting an apron to use when she cooks and bakes with me so this was awesome! The smaller apron is for Little S, but she is not too sure what to think of it right now. They came from my youngest sister, who made them with the help of our mom. She chose the best colors, which I am in awe of. Great job, Raquel!

I really like the pleats at the top of the biggest apron.

This patchwork bird applique' is sooo adorable!

There were a few places where the stitching was done in a curvy fashion. I love all of the details, time and effort they put into these. They will definitely be something I will not part with when the girls outgrow them either. They will make great heirlooms.:)

Thursday, January 5, 2012

A favorite holiday pie

As I've been planning on what to write here over the next few weeks, I couldn't pass up sharing a few holiday favorites, including this pie:

It is no ordinary pie, either as it has three layers of sweetness! On the bottom is a chocolate layer, followed by a cheesecake layer in the center, then to top it all off, a pumpkin pie layer!

I found the recipe for Pumpkin-Chocolate Cheesecake Pie in Better Homes and Garden's Annual Recipe Book from 2008. You'll definitely want to try it for a holiday, birthday or other special event. Enjoy!

Pumpkin-Chocolate Cheesecake Pie

1 recipe Deep-Dish Pie Pastry (see at bottom of recipe)
12 oz. cream cheese, softened (1-1/2 8 oz. pkgs.)
1/4 cup granulated sugar
1 egg, lightly beaten
3/4 cup miniature semisweet chocolate pieces
1 15-oz can pumpkin
2/3 cup packed brown sugar
2 teaspoons pumpkin pie spice
4 eggs, lightly beaten
3/4 cup half-and-half or light cream
chopped chocolate (optional)

1. Preheat oven to 450 degrees. Prepare and roll out Deep Dish Pie Pastry. Transfer pastry to a 9-1/2 to 10-inch deep-dish pie plate. Trim crust edge 1/2 inch beyond pie plate. Flute edge high. Line pastry with double thickness of foil. Bake 8 minutes. Remove foil; bake 6 minutes more or until golden. Cool on wire rack. Reduce oven temperature to 375 degrees.
2. In medium mixing bowl combine cream cheese, 1/4 cup granulated sugar, and 1 egg; beat on low speed until smooth. Spread cream cheese mixture in cooled pastry shell. Sprinkle with chocolate pieces.
3. In bowl combine pumpkin, brown sugar, and pie spiece. Stir in 4 eggs. Gradually stir in half-and-half. Slowly pour pumpkin mixture on chocolate layer. To preven overbrowning, cover pie edge with foil.
4. Bake 60-65 minutes or until knife inserted near center comes out clean. Remove foil. Cool on wire rack. Cover and refrigerate within 2 hours. Top with chopped chocolate. Makes 8 servings.

Deep-Dish Pie Pastry--In medium bowl stir together 1-1/2 cups all-purpose flour and 1/4 teaspoon salt. Using pastry blender or two knives, cut in 6 tablespoons shortening until pieces are pea size. Sprinkle 1 tablespoon cold water over part of flour mixture; gently toss with fork. Push moistened dough to side of bowl. Repeat, using 1 tablespoon water at a time, until all flour is moistened (5 to 6 tablespoons total). Form into ball. On lightly floured surface, flatten dough. Roll pastry from center to edge to 13-inch circle.

Top with whipped cream if you'd like--yum!:)

Wednesday, January 4, 2012

Come and join me....

Happy new year, everyone!

Life has been busy, but this year I've got a plan to keep up with the important things in life. I love organization, but with the girls joining our family this last year, things around the house have become very disorganized. I was simply surviving as a wife, mom, and keeper of my home. This year I really want to thrive!

So....for the past couple of weeks, I've been reading, researching and trying out new things to help me be all that I can be for the Lord and my family. Here are a few things that I am beginning in this new year, that I hope will help you as well:

Personal Growth: I know that I can't do anything well without the Lord's help, so I'm striving to get to know Him better through Bible reading. A devotional book by Jason Janz called, Alone with God, should help me with this goal. I'd also like to read some books and on the top of the list are....Changed into His Image, by Jim Berg, The Ministry of Motherhood, by Sally Clarkson and Kisses from Katie, by Katie Davis.

Home Organization: I found a neat website called Home Storage Solutions 101 and I love it! Each week, you're given a new area in your home to tackle and get organized. This week's challenge has been to clear kitchen counters for more space and to keep your sink free of dirty dishes as much as possible. It's been a little bit of a challenge, but I'm already seeing improvement. I've already begun next week's challenge--kitchen cupboards! If you sign up for their emails, you will receive a weekly task for the whole year.

Menu Planning and preparation: I am still going to be using E-mealz as much as possible, but I needed to find a way to write out what I'm going to be preparing for each meal every week. If you click here, you'll find several templates to help you with meal planning. I'm currently using design #4 and I have it posted on my refrigerator for easy reference.

Mothering with Purpose: As a new mom, I'm enjoying spending time with the girls. But, I have found with not being very organized with the above mentioned things, that it hasn't left much time on teaching times and special activities with the girls. So, I'm going to be working this week with A on a craft and cooking list. There are so many things she wants to learn how to do, so we're going to make a list and aim for at least one a week. I'm also working on getting some busy boxes together for Little S. Having a better routine with this active 16-month-old will help her grow, but also keep her out of trouble. Yes, I've seen her get bored with toys, and that's when she pretends she's a tornado and all of our belongings are strewn all over the house.:)

Of course, these are just a few areas of my life; there is so much room for growth in my marriage, church ministry responsibilities, musical abilities, crafting, and community involvement. I haven't written down ideas for these other things yet, but I will in the days ahead. Each new year is like a blank canvas. It has no mistakes in it; it just has room for it to become beautiful. I know that the Lord can enable us to become more beautiful in His eyes as we strive to please Him in every area of our lives.

How about you? What new things would you like to accomplish this year?

Wednesday, November 30, 2011

Turkey cookie treat

At my last MOPS meeting, someone in my group brought a sweet treat for us to enjoy:

So cute, huh? The turkey's body is a chocolate-covered cherry--yum! It was a nice surprise. Everything was "glued" together with chocolate frosting. The girls loved eating theirs up as I was able to bring a few of them home with me.

Just another cute idea to remember for next year.....

Edible Indian Corn

Here's a yummy treat that I made for A's class right before Thanksgiving break. I found this idea on Family Fun and I could not wait to try it out! This edible Indian corn looks hard to put together, but it really is not. I did the majority of the work and then A helped me put on the green fruit leather at the end.

These treats were a huge hit with her teacher and classmates.

So, here's the recipe for ya if you want to give them a try. I'm sure you can make some interesting shapes, perhaps stars for the Christmas season. :)

Edible Indian Corn
Makes 15 treats

4 tablespoons butter
4 cups mini marshmallows
5 cups puffed corn cereal (KIX)
1-1/3 cups diced dried fruit
popsicle sticks
fruit leather

In a large pot, melt butter and mini marshmallows over low heat (about 5 minutes). Remove the mixture from the stove and use a wooden spoon to stir in puffed corn cereal and diced dried fruit. Allow the mixture to cool for about 10 minutes. Using buttered hands, shape each treat by pressing 1/3 cup of the mixture around a popsicle stick. Add fruit leather husks to the bottom of the ear, slightly moistening them to help them stick if needed.

Wednesday, November 16, 2011

The Thankful Tree

We started a new tradition in our house this year for the Thanksgiving season. We have a thankful tree on our dining room wall. It is not complete yet, but hope to have more thankful hands on it before the month is over.

I used brown packaging paper to make the tree and wrote "The Thankful Tree" on it as well as First Thessalonians 5:18 ("In everything give thanks....). Then, on most days after lunch we trace one of our hands and write something we're thankful for. It's been an encouragement to me in so many ways. I have been delighted to see A get so into it. In fact, she has written a few of them herself. My heart smiled after I asked her what one of them said. She said, "I'm thankful for you, Theo." :)

What traditions do you have for Thanksgiving? I'd love to hear about them!:)

Thursday, November 10, 2011

Lovin' my pumpkins!

Happy Fall, everyone! I hope you are enjoying the sights and scents of the season. There have been days when I look outside and see that fall is in full swing. But, there have been days that feel like summer and a few days where we've seen a white Christmas! It's kind of strange, but that's Colorado for ya!

If you were to come into my home, you'd see lots of pumpkins in many forms--some ceramic, some fabric, and a few that are the real thing. Here are a few of my favorites, including an easy craft idea:

I made this fabric pumpkin at one of my M.O.P.S. meetings. It's adorable and sooo easy to put together. I think A and I will make some of these for our Thanksgiving potluck at church (and perhaps use them for our Thanksgiving celebration with family). All you do is take a fabric quarter (found in quilting section at the craft store) and place it right side down on a table. Take a toilet paper tube and place it standing up in the center of the fabric as you put three plastic grocery sacks around it forming your pumpkin. Take the corners and edges of your fabric and push it into the tube. Use a small piece of a paper lunch sack and twist it to make a stem. Then, curl green pipe cleaners (two are recommended; I lost one of mine!) and stick them next to the stem. Now you have the cutest little pumpkin to decorate--and take apart later if you'd like for easy storage.:)

A can't wait to roast pumpkin seeds this year! I'm going to teach her how to scrape out the seeds and cook the pumpkin meat. Perhaps we'll even make that pumpkin pie that Q has been hinting about!

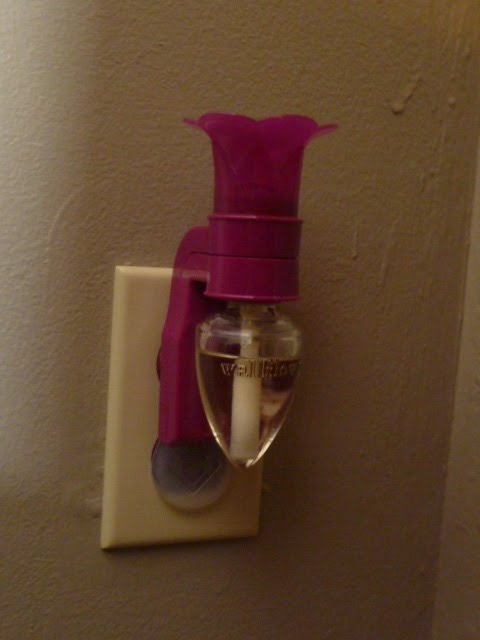
Do any of you have a wall flower from Bath and Body Works? I love their scents and right now, I have creamy pumpkin. It has been one of my favorites! You've got to try these if you haven't yet.:)

What's your favorite thing about fall these days?