Here's a quick tutorial on how to put together your own garden journal. I did this one for our nephew, Gabriel. The printable worksheets were copied from Homesteadgarden.com.
Hope you're having a wonderful time gardening this season!:)
 I found this chalkboard sticker sheet at the dollar store. It actually has a big sticker on the back, too, so there's lots of room to write things on if you want to use it the way it is. This was my starting point on the project. I also gathered a pencil, scissors, ruler, glue stick, photo corners, sticker dots and chalk to make it all come together.
 I used my ruler to make strips along both stickers. Removing the white decoration, I was able to make the labels 2-3/4" by 1-1/4 inches.
 I left the backing on the labels so that they wouldn't permanently adhere to my canisters. You can remove these type of stickers from walls, but not from plastic canisters. I glued on some pretty gold photo corners to each corner.
  Using white chalk, I wrote a dry good item on each label. I placed a few sticker dots to the back of each before placing them on my containers.
  I'm happy with the end result. Best of all, it hardly cost me a thing, since I had most of the items on hand. Besides being able to erase the labels as needed, they can easily be removed by peeling off the sticker dots. If it leaves a sticky residue, you can wipe it off with some Goo Gone to make your canister as good as new!
 It was in the clearance bin for $1. Next to it was a pile of t-shirts for $1. Then, it hit me--why not make him a t-shirt to match the back pack? I also ended up making a Spidey wallet, too, as you all know.
  Then, I cut out the photocopy and traced it onto the t-shirt using tailor's chalk. Looking at the picture on the backpack, I drew on the main details, mostly to identify the separation of colors.
 Spiderman's main colors are red and blue, so this step was easy to do. I used acrylic paint to color him in. It's very important that if you try this that you don't use washable acrylic paint.
 This next step was challenging, but I was pleased with the end result. I added depth to this character by adding shading to his body. I added a touch of black paint to each of the colors, then painted lines to show his knee bends and muscles. Then, I added his white eyes and outlined them in black.
 The final touch to his body was adding the black web lines. Q took me to Hobby Lobby when it was snowing heavily just to get the right tool to do this! I bought a fine tip fabric marker and finished him up. I also added some light blue shading around his eyes. Using both light blue and dark blue paint, I gave him the web he's holding onto.
 Here's how you can make your very own baby crinkle square. First, gather up these materials:
 Now, here's how to put it all together:
 3. Cut out a piece of crinkly plastic the same size as your fabric squares.
 4. Sew on the plastic piece to the back side of the other fabric piece. Stitch as close to the edge as possible, like a 1/4-inch margin.
 This is the other side of the crinkle square I made. The duck and turtle motifs are adorable! Have fun making a bunch of these for your baby or for baby shower gifts. The crinkly sound will be fun for them, and it also gives them something to chew on as they're teething.;)
  To make your own wintery card village, here's what you'll need:
 3. Using card stock or your extra card scraps, make window panes on your window openings. Tape the pieces on the inside of the cards. You can tape sheets of tissue paper if you'd like as well.
 6. To make my houses look cute and whimsical, I put tape on the top corners of each roof.
  7. To create a snowy effect, place fiberfill around your card houses.
 I really enjoyed dressing up my coffee table with this simple decoration. These paper houses can be made for other seasons by using other types of cards--Easter, Thanksgiving--you name it! And what can you do with them when the season is over? Give them to the little people in your life and they will have fun playing with them.
  It all started with a simple drawing of what I wanted my turkey to look like. Here's my pencil drawing. Disregard the colors, as I ended up changing a couple of them later on.
 These are the materials you'll need:
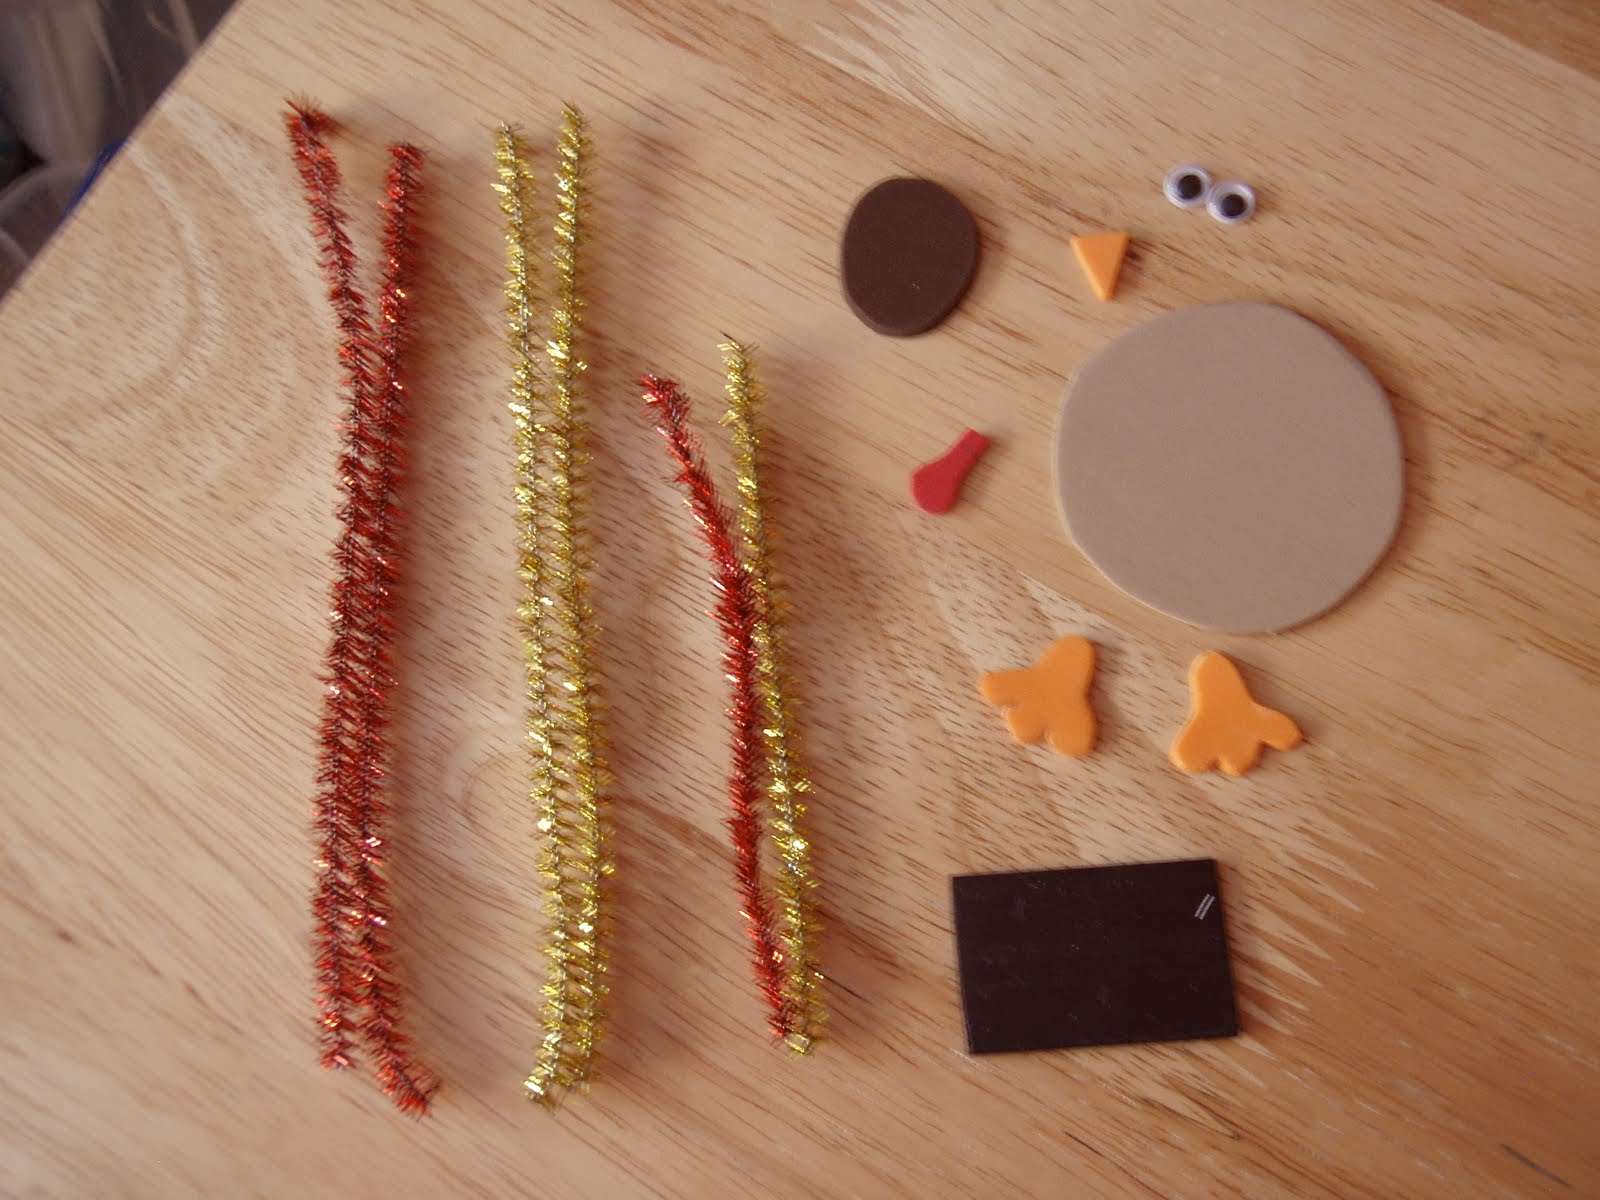 How to: Using my pictures as your guide, use a pencil to draw out your turkey pieces on craft foam. To give you an idea on measurements, the round body piece is 2 inches in diameter. Cut out two feet and beak from orange foam, his head from dark brown foam, his body from light brown foam and his gobbler from red foam. Then, cut out your pipe cleaner pieces as follows: two pieces of red that are 6 inches long, two pieces of yellow that are 6 inches long and one of each yellow and red that are 4 inches long.
 Once you have your pipe cleaners on, glue on your magnet and let dry. When he's all done, turn him around and write, "Give Thanks" on his body.
 Step 2: Add water and mix by hand.
 Step 3: Knead dough until it is nice and smooth.
 Step 5: Roll the tistales into 8-inch circles. (I'm not sure how big mine were, as I experimented with different amounts of dough to roll out.) You'll want to make sure that you roll it out as thin as possible!
 Step 6: Place on a hot cast iron griddle (comal). You will not need to grease the pan. (I learned this the hard way when I put my first one on there and it came out so greasy.--yikes!!) Turn tortilla until done (about 30-45 seconds on each side).
 Step 7: Enjoy your warm homemade tortillas! I used ground turkey to make our soft tacos. Another lady in my church gave me a recipe for making your own taco seasoning mix. Q and I both enjoyed this new seasoning. Try it out for yourself!
 The first thing you want to do is take out all the dead leaves and mushy berries as you rinse them. I placed mine in a colander and used the spray nozzle to get them really clean. Lay them on a towel to dry.
  After I washed my strawberries, I pulled the leaves off and proceeded to take out the hulls. I read somewhere that an easy way to do this is to use a straw. Poke the straw through the bottom and out through the top. It's pretty easy to do, but with large strawberries, you may have to go through a second time to make sure that the hull is completely gone.
 I placed wax paper on a cookie sheet and put my berries on top. You'll want to make sure that this is done in a single layer so that each berry can freeze individually, instead of in clumps. Place the cookie sheet in the freezer for a few hours (or overnight).
 I remembered that I had a Ziplock vaccuum sealer and bag starter kit that I received free in the mail a while back. Any type of freezer bag or container would work, but I thought that using this kit would be great for keeping the berries really fresh. Measure out your berries and seal them in well. Write the date and how much you have in there for future reference.
 And just for kicks, I decided to freeze chunks of bananas. Lizzy at Uplifted Eyes experimented with this, so I thought I would try it, too. They are in the freezer right now as I write this. They are awaiting the next step to be put into those freezer bags. I hope it works!
 I will explain how to make your own set so you can share the true meaning of Easter with your children, Sunday School classroom--or even the kids in your neighborhood!


